DNS monitor

Learn which monitor is best for your requirement

DNS monitor

Step 1: Creating a DNS monitor:

  • Go to MonitorsCreate monitor.
  • Change the Alert us when the URL above selection to "When DNS records get's changed".
  • Select the type of DNS record you want to retrieve (A, AAAA, MX, etc.).
  • Enter a domain name in the Domain to monitor field.

image 6

Step 2: Choosing the alerting options

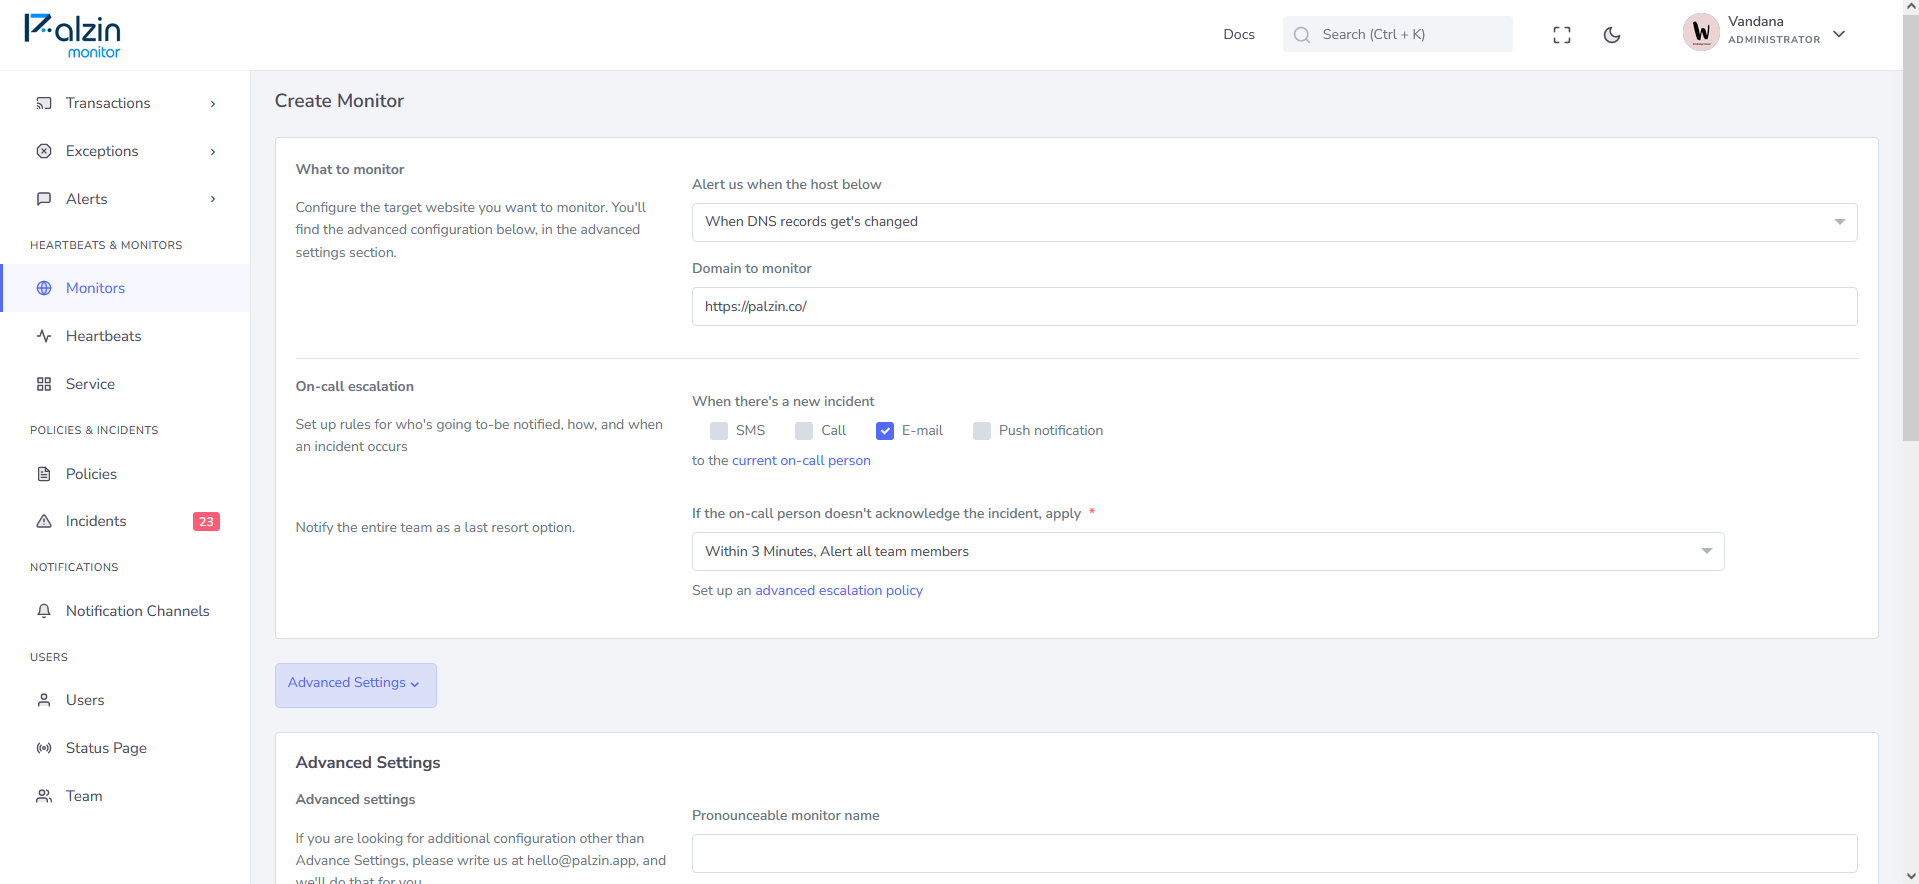
Now that we have defined what the monitor will check, we need to define what happens when the check fails. Specifically, we need to set up who will get alerted and how. The alerting options we can choose from are:

  • Phone call — This is ideal for any vital business pages that need to be available 24/7. Phone calls are fully automated.

  • SMS — This is ideal for less critical alerts, such as low-traffic blog pages, or for use in combination with other alerting methods.

We recommend saving the Palzin Monitor phone numbers, so you know who is calling or texting you right away.

  • E-mail — Same as SMS alerting - ideal for less critical monitoring or in combination with other methods.

We recommend whitelisting the @palzin.app domain in your email client, so that incident alerts are marked as important. This will also prevent any important alerts from going into folders other than the main inbox.

Read how to do that in our tutorials for Gmail or Outlook.

  • Mobile app push notification — This is ideal as a secondary alerting method or in combination with other alerting methods. Push notifications are available for both iOS and Android. To set them up, go to IntegrationsExporting data, and you will find the installation guide under Mobile apps.

Step 3: Choosing the escalation options

  • If you have multiple users or teams using Palzin Monitor, you might like to explore the on-call scheduling and alerting section. There, you can learn more about how on-call works and how to set up escalation policies to fit your team.
  • For single-user teams, simply leave the default option in.

Step 4: Creating a monitor

  • Now that we have finished the basic setup, we can click on Create monitor.
  • The monitor is now up and running, continuously checking the URL.

Accept Incoming Changes (DNS Monitoring)

When you are working with DNS Incident we have added a smart way to continue the monitoring of DNS so the changes can be accepted easily.

When an incident is created for DNS Monitoring, you will see a button of "Accept Incoming Changes". If you find that the changes that are provided in the incident are acceptable then just click on "Accept Incoming Changes" and then "Resolve Incident".

Note: A user who has acknowledged the incident can only see the option to "Accept Incoming Changes".

Last updated: 1 year ago

Want to get started with Palzin Monitor? We offer a no-strings-attached
15 days trial. No credit card required.

It takes less than a minutes to setup your first monitoring.